

Product
Your best business partner
PP-R Pipe & Fittings
Hand
Welding Tool
Hand Welding Tool
-

1. Fix heating bushes
Install the heating bushes on the heating plate.
Maximum two set of bushes can be installed on the plate. -
2. Set the temperature
After put el. power, set the temperature at side.
The temperature range must be between 250 °C and 270 °C.
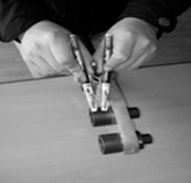
The temperature can be checked by two thermostatis pencils. -
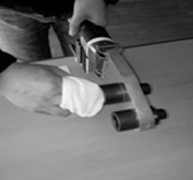
3. Clean the heating bushes
After checking the temperature,
clean the heating bushes with suitable cleaning agent (e.g. industrial
alcohol), with unused, absorbent, non-fraying and non-died paper.
Cleaning must be repeated whenever welding residues accumulate
in the heating bushes. -
4. Cut the pipe
Cut the pipe at right angle. -
5. Clean pipe & fitting
Clean all joining faces of pipe and fitting with suitable cleaning agent
(e.g. industrial alcohol), with unused, absorbent, non-fraying and
non-died paper to remove any impurities and especailly oil and grease. -
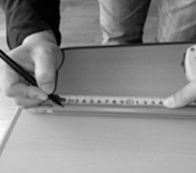
6. Mark the insertion depth
Mark the insertion depth on pipe according to recommended
table for each dimension.
The mark should remain visible during heating and joining. -

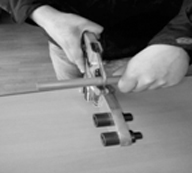
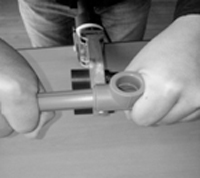
7. Heat pipe & fitting
Simultaneously push the fitting and the pipe on to the heating spigot
respectively into the heating bush as far as the stop respectively the mark.
Avoid pushing the pipe too deep (bump into the end of the
heating bush) or not deep enough. Wait till recommened heating
time specified in below table elapses and do not let go of pipe and
fitting during this time. -
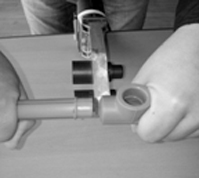
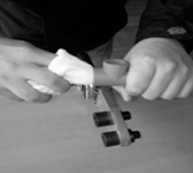
8. Join pipe and fitting
Pull fitting and pipe off the heating bush/spigot and immediately
push them together as far as the mark or stop (see below table for
max. change over time). Do not rotate pipe and fitting during joining
for more than 15°. During cooling time any rotation and adjustments
in alignment shall be avoided. -
9. Fusion inspection
The outer fusion bead must be inspected.
A double bead must be uninterrupted all around the
pipe circumference.
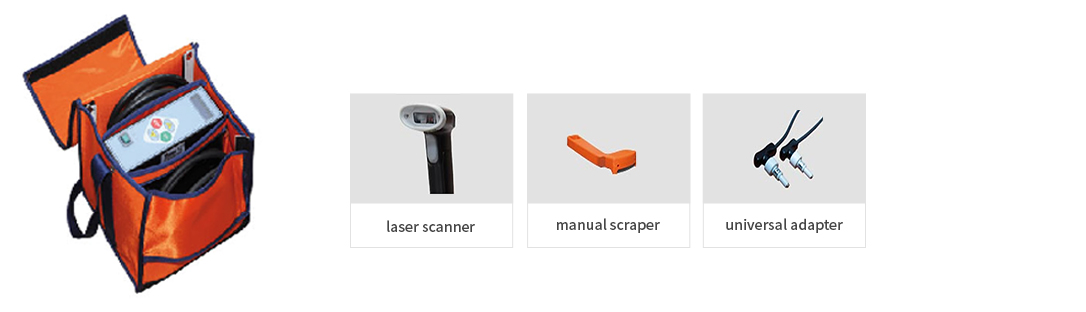
Electrofusion
Welding Tool
Electrofusion Welding Tool
-
1. Turn on the welding tool and connect a scan reader.
-
2. Clean and scrape the pipe ends to be welded. The pipe which size is d20, d25,
d32 or d40 can be inserted into an EF socket without scraping, but for the size
of d50 and d63, scraping the surface of the pipe ends is needed.
*Pipe ovalisation (<1.5%) -
3. Insert the pipe ends into the EF Socket. Make sure the pipe ends meet each other
at the center of the EF socket and shall be in alignment with EF socket. -
4. Insert the welding connectors into the EF socket pins.
-
5. Press OK pushbutton. (The message “READ BAR-CODE” will be displayed.)
-
6. Read bar code on the EF socket with the scan reader. (The display will show the
information regarding the manufacturer, diameter, welding voltage and time.) -
7. If the information is correct, press OK to confirm. (The message “Have you
scraped and aligned?” will be displayed.) -
8. Press OK to start welding. (The display will show the welding voltage and time.)
* You can stop the welding at any time by pressing STOP pushbutton. -
9. The good outcome of the welding cycle is confirmed by the message
“welding OK!” on the display. Press STOP to return to the main menu. -
10. In order to avoid mechanical strain (e.g., flexion, traction, torsion) on the joint
just made, make sure the pipes and EF socket remain in position during
the cooling time. -
11. Disconnect the welding connectors from the EF socket.
Bench Type
Welding Machine
Bench Type Welding Machine
